Asset Management Map View
The Map View provides a visual representation of each floor of your facility and where tagged items are located. The Map View includes a legend which defines the color statuses of the locations using predefined rules and events established by your System Administrator.
To view selected items (staff, patients, equipment) in a Map View, complete the following steps:
- Click the Map button located above the Options Panel. The map view window appears.
- In the Map Filters Panel, complete the fields in the following table:
Options Panel Fields Selection Type a Map Name Type the name of the map you want to view.
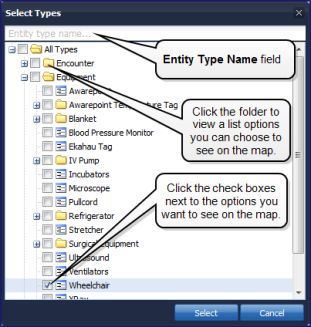
Tip: Start typing the name of the map and options appear in a selection list. Click the map you want from that list.Select Types To select the option you want to view on the map, complete the following steps:
- Click the Select Types field. A list of options appear in a folder structure.
Tip: Simply start typing the equipment type until a list of options appear. For example, start typing wheelchair and then select wheelchair from the options list. Once you select wheelchair, the equipment folder expands so you can view and select the wheelchair option (see image below).
- Click the option types you want to view on the map and then click Select. For example, you can click Equipment, and then click Wheelchair to view all of the wheelchairs on the map (see image below). Once you click Select, you are redirected back to the Map Filter.
- To remove an option, click the items you would like removed from the Select Types area and click the Remove button.
- Click Select to save your selections or Cancel to end the process and return to the previous window.
Note: The selections you made are listed directly below the Select Types field.
Status Select the current status of the item you want to view on the map. For example, select Clean to view only IV Pumps with the status of “Clean”. Enter Search Term Type a word or phrase in this field if you want to search by a certain word or phrase.
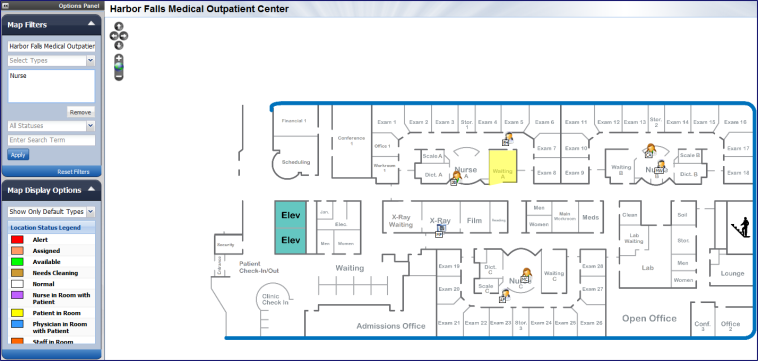
- Click the Apply button on the Map Filters panel. Items matching your filter criteria appear in the Map View window (see image below).
Note: Once you click the Apply button, it is disabled until you select new search criteria in the Filter panel.
Tips:
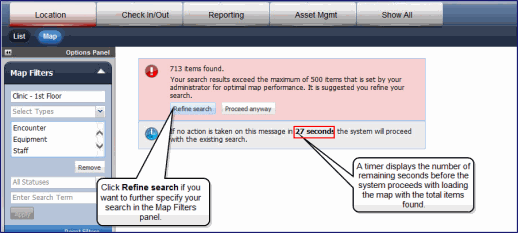
- The default maximum number view on the map is 500 items. When you select your options, be as specific as possible or the following error messages appear, depending on your configuration:
- If the following error message appears, you have a configurable time period (default is 30 seconds) to either refine your search or the system automatically proceeds with loading the items on your map (see image below).
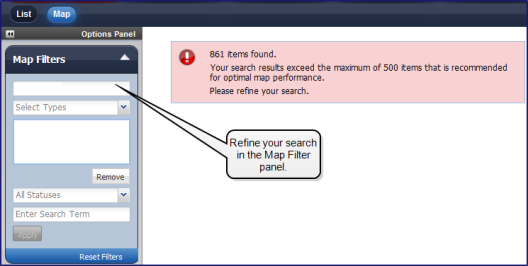
- If the following error message appears, refine your search in the Map Filters panel and then click the Apply button.
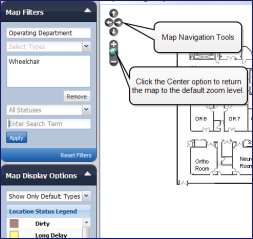
- Use the Navigation tools in the upper left corner of the Map View window to Pan, Zoom, or Center the map (see example below).
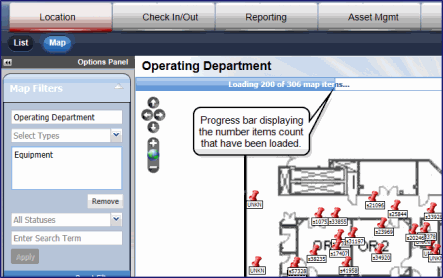
Note: When you click the Apply button, a progress bar appears next to the Map Filter area displaying the progression of the icons downloading to the Map View window if there are many items to load (see image below).
- In the Map Display Options Panel, complete the fields in the following table:
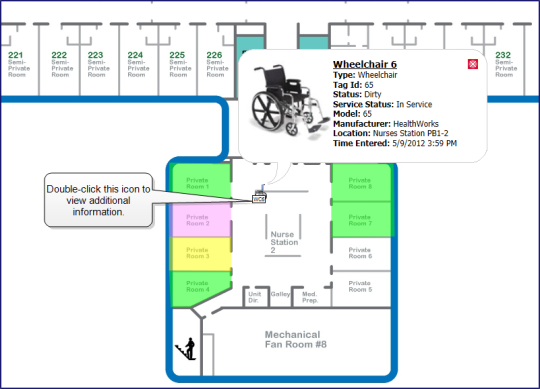
- Double-click the icon on the Map to view additional information about a specific asset or person (see image below). A Summary window appears with detailed information about the asset or person.
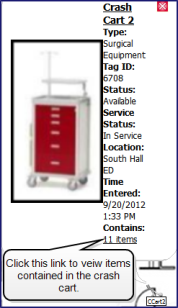
Note: If this item contains other equipment or supplies, you can view its contents by clicking the Contains link (see image below). For example, click the Contains link to view what items are currently contained in Crash Cart 2.
For more information, view the Maps Training Video.